|
|
- Info
Writing motto: "Teach the writer, not the writing."
Writing Motto: "Teach the Writer, not the Writing."
 It is imperative that all teachers focus on teaching writing skills and strategies needed for students to become great authors. Hence "Teach the Writer, not the Writing" implies that all students writing abilities vary from student to student and class to class. Therefore, genre and skill specific instruction should be provided along with process writing to ensure that students obtain the skills they need to increase writing proficiency. This can be achieved in various ways through skill specific directed or guided mini lessons in small, whole, or individual conferences. It is imperative that all teachers focus on teaching writing skills and strategies needed for students to become great authors. Hence "Teach the Writer, not the Writing" implies that all students writing abilities vary from student to student and class to class. Therefore, genre and skill specific instruction should be provided along with process writing to ensure that students obtain the skills they need to increase writing proficiency. This can be achieved in various ways through skill specific directed or guided mini lessons in small, whole, or individual conferences.
Writing Workshop Model of Instruction Research Base
Writers Workshop is a part of the management system we use to
structure our writing time.
- Mini-Lesson (5-15 minutes). A short lesson focused on a single topic that students need help
with. The teacher determines whether to teach a mini-lesson each day
or just 2-3 times a week.
- Mid workshop check-in (2-5
minutes). A quick way of sharing
reminders for writing or to refocus students' attention. The teacher determines
when to hold a mid workshop check-in.
- Writing Time (20-45 minutes or more!). While students write the
teacher uses that time to conference
with individual students or small groups.
- Sharing
(5-15 minutes). Writers read what they
have written and seek feedback from their audience. You can share your
writing, too. Sharing time is determined by the teacher.
Planning Writing Instruction
At the start of our writing instruction transformation, we started using the Lucy Calkins Primary Units of Study to provide instruction for our students in conjunction with the Writers' Workshop model. As we continued our journey, we received training from Growing Educators to plan monthly writing units focused on specific genres. Where are we today? We needed to figure out a way in which our students' writing would grow exponentially. In our reflection, we determined that our students need more on "how" to write. We determined that we needed more information on "how" to teach students to write to bridge the gap.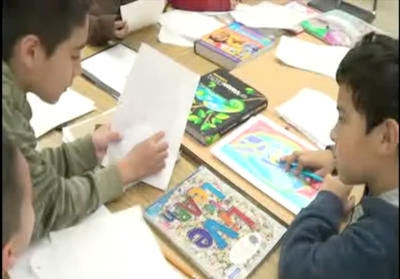
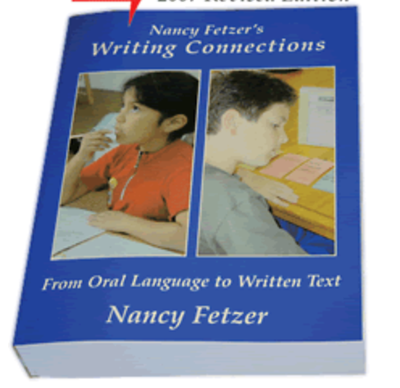
Research on this problem led us to utilize Nancy Fetzer's "Writing Connections-From Oral Language to Written Text". We felt that teaching students to "really plan" their writing would be necessary to help them become better writers. The tools and strategies actively engage our students in writing organized, sophisticated sentences and paragraphs, which include academic language, voice, and vivid descriptions while always staying on topic.
Management of Writers Workshop
To establish and maintain the writing workshop, it is imperative that procedures/routines are put in place. The following serve as guidelines for managing the workshop which will allow it to run more smoothly and the teacher to confer or teach small groups:
- When and how students can sharpen their pencils
- When and how to use the green pen for revising and the red pen for editing
- Where paper and other writing tools are kept
- When students are stuck, they should use the resources in the room to help them (e.g. anchor charts, dictionaries, 'Have a Go' cards or flip book, other published works, classroom books, other students or writing partner)
- Procedures for arranging for conferences
- Procedures for partner editing, publishing
Click on the following links to view examples of tabletop flipcharts/anchor charts : Questioning the Writer Flip Chart, Editing Flip Chart & Process Writing Pathway Flip Chart.
Conferring
 What
are the goals of a writing conference? What
are the goals of a writing conference?
- When
conferring with a student, it isn’t your job to fix or edit the student’s
writing. Rather, it’s to teach the student one writing strategy or technique they can use in a current piece of writing and continue to use in future writing. As
you confer, keep in mind Lucy Calkins’ wise advice: “[We] are teaching the
writer and not the writing. Our decisions must be guided by ‘what might help
this writer’ rather than ‘what might help this writing’” (1994).
When
should I confer with students about their writing?
- Writing
conferences can be held at any time students are writing in the classroom.
During writing workshop, we confer with students as they spend days and even
weeks working on a piece of writing. Usually, writing workshop begins with a
short mini-lesson (a whole group lesson), then our students work independently
on their writing for twenty to forty-five minutes. During this independent writing
time, we circulate around the classroom and confer with students.
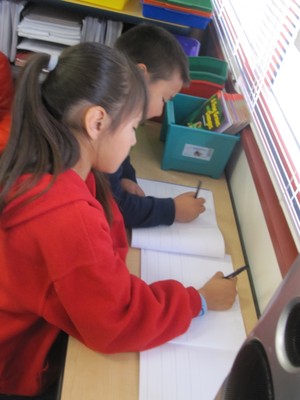
What does conferring look like in our classrooms?
- When
conferring, we move from table to table (or desk to desk) to sit next to
students as they write. During a
conference, we sit side by side with a student, with his/her writing in front
of both of us. To make the conference feel like a conversation, we ask
questions and share information that will engage our students in talking and
listening. For example, we may ask what the student is doing as a writer,
compliment what the student is doing well, then teach a writing strategy or
technique. We may also prompt the student to tell us what he/she is working on and
what he/she needs help with, and at the end of the conference, to describe how he/she
will use the writing strategy you just taught. Each writing conference is five to seven minutes; therefore, you will probably
confer with four or five students in a class period, depending on how much time
students have to work independently. After
each conference, note on the record-keeping forms any areas of need and the
student’s progress. This helps us remember the strategy taught and ideas/goals
for follow-up conferences.
What
does the teacher do during the writing conference?
During the first part of the conference, identify an area of
need. First, find out the stage of the
writing process the student is in—prewriting (or rehearsal), drafting, revising, or editing—and the specific
kind of writing work she is doing at this stage. Then assess how well the
student is doing that writing work. For example, the student may be in the
prewriting stage, trying to find a topic to write about, but is having trouble
finding a really good topic. Or perhaps the student may be drafting, trying to write
with detail, but his/her writing is general and does not render a clear picture
of the subject. There may an instance where the student may be editing by reading his/her draft to
herself, but this strategy isn’t helping him/her locate the end of sentences
that need periods. To identify an area
of need, you can take three steps during the first part of the conference:
- Step 1: Ask an open-ended question. By asking an open-ended
question, you invite the student to tell you about what he/she’s doing as a writer.
Questions such as “How’s it going?” “What are you doing as a writer today?” and
“How can I help you today?” are good ones to start with.
- Step 2: Ask follow-up questions. Once your conversation with
the student gets started, ask follow-up questions. Although the best questions
can’t be planned—you will think of them as you listen to the student tell you
what he’s doing—there are a few general questions that can help move along a
conference. Effective follow-up
questions include “Where are you in the writing process?”; “What strategies are
you using in this stage of the writing process?”; and “What are you doing to
write this piece well?”
- Step 3: Look at the student’s writing. Looking at
the student’s writing helps you identify an area of need. Usually it isn’t
necessary to read an entire notebook entry or draft. If a student is drafting,
for example, and working on a lead, just read the lead. If the student is
working on topic sentences in a nonfiction draft, take a close look at those
sentences.
Part 2 of the Writing Conference
In the second part of the writing conference, you’ll teach the
student a writing strategy or craft
technique to help him grow as a writer. There are many things students need to learn in
order to become lifelong writers—and you can teach them as you confer with
students across the school year. Writing
Conferences show how to teach the broad range of writing strategies and
techniques students need, including the writing process, qualities of good
writing, and how to be initiators of writing. The writing process itself is the focus of many conferences. Students need a repertoire of strategies to
help them prewrite or plan their writing (or rehearse a topic before drafting),
draft, revise, and edit. In addition, the teacher can provide guided
instruction on elaborating on ideas, using commas, quotation marks, or even use
a mentor text to help students make connections in their writing with an
author, etc. Every
conference models the instructional language and moves that will help teach
students, following these four steps:
- Step 1: Give feedback. Preface your teaching by giving the
student feedback. Try to point out something the student is doing well—and also
name the area of need.
- Step 2: Teach. Just like a story reaches the climax, a
conference builds to the teaching moment. Your success in helping a student
grow as a writer in a conference depends on your skill as a teacher in the next
few minutes. Start by naming and
defining the specific strategy or craft technique that you intend to teach.
Explain why it’s important for the student to learn. To help the student
understand the strategy or technique, you might show an example of how a
children’s book author, such as Patricia Polacco, uses the strategy or
technique. Or how you use the strategy in your own writing. Most
importantly, explain how the student can use the strategy or technique in his
own writing.
- Step 3: Try it. Before you end the conference, help the student
try the strategy or technique you just taught. Gently nudge the student to talk
out how she/he could use the strategy in their writing, or have the student try it in
writing. The purpose of the “try it” step is to give the student a taste of the
strategy—enough so that you know he/she is ready to try it independently.
- Step 4: Link to the student’s work. End the conference by linking
the conference to the student’s work, that is, tell the student you expect him
to try the strategy in his writing and that you hope he will continue to use it
in future writing.
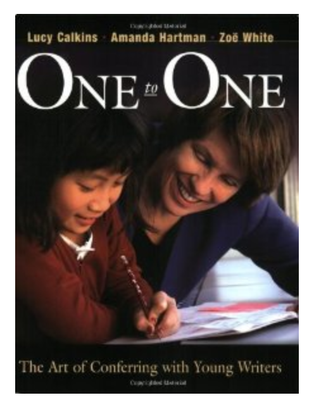
Lucy Calkins' book, "One to One - The Art of Conferring with Young
Writers" was utilized to establish and identify protocols for
student/teacher writing conferences.
Writing Partnerships
Children need
to talk on a daily basis, learn to carry on longer conversations, and discuss
books regularly. Establishing writing partners and providing opportunities for
partners to share will support students in learning how to talk with others about
their ideas and work.
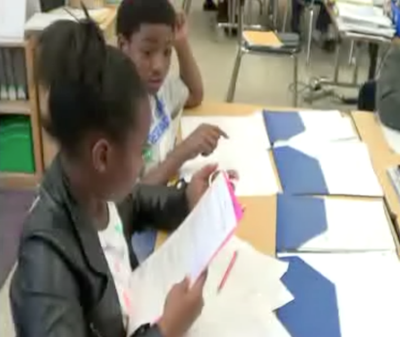 Throughout writing, our students have learned that writers share ideas to help their
ideas grow. But prior to these partnerships, we found that it is important to model the behaviors associated with working in partnerships through a series of lessons as well as giving students the opportunity to practice. Questions are also listed on anchor charts and flip charts for students to access. Throughout writing, our students have learned that writers share ideas to help their
ideas grow. But prior to these partnerships, we found that it is important to model the behaviors associated with working in partnerships through a series of lessons as well as giving students the opportunity to practice. Questions are also listed on anchor charts and flip charts for students to access.
Anchor Charts: Making Thinking Visible
To maintain student learning, we took into consideration our students learning modalities. One way to "Make Our teaching Stick" (Lucy Calkins), we created a variety of charts to anchor student learning.
Purpose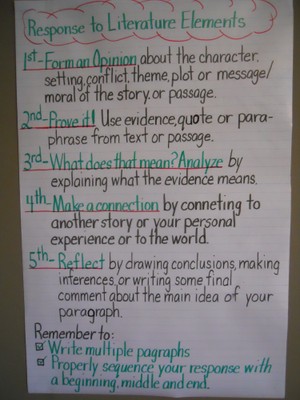
- Anchor charts
build a culture of literacy in the classroom, as teachers and students make
thinking visible by recording content, strategies, processes, cues, and
guidelines during the learning process.
- Posting anchor
charts keeps relevant and current learning accessible to students to remind
them of prior learning and to enable them to make connections as new learning
happens.
- Students refer
to the charts and use them as tools as they answer questions, expand ideas, or contribute
to discussions and problem-solving in class.
- Gives students ownership over their
learning and to "anchor" unknown topics to their own experiences.
Building
Anchor Charts
- Teachers model
building anchor charts as they work with students to debrief strategies modeled
in a mini-lesson.
- Students add
ideas to an anchor chart as they apply new learning, discover interesting
ideas, or develop useful strategies for problem-solving or skill application.
- Teachers and
students add to anchor charts as they debrief student work time, recording
important facts, useful strategies, steps in a process, or quality criteria.
- Students can create anchor charts during small group and independent work to share with the
rest of the class.
- Desktop flipcharts are another way to anchor students learning. These charts are placed on the desk and can be either designed for the class or groups of students or individual student needs.
C lick on the following links to view examples of tabletop flipcharts: Questioning the Writer Flip Chart, Editing Flip Chart & Process Writing Pathway Flip Charts
- Anchor charts
contain only the most relevant or important information so as not to confuse
students.
- Post only
those charts that reflect current learning and avoid distracting clutter—hang
charts on clothes lines or set-up in distinct places of the room; rotate charts
that are displayed to reflect most useful content.
- Charts should
be neat and organized, with simple icons and graphics to enhance their
usefulness (avoid distracting, irrelevant details and stray marks).
- Organization
should support ease of understanding and be accordingly varied based on
purpose.
- Charts are
best in simple darker earth tones that are easily visible (dark blue, dark
green, purple, black and brown—use lighter colors for accents only).
Click on the following link to see additional examples of charts for writing: Writing Charts.
|